


You've made a smart investment in your rubber flooring, choosing it for its unparalleled durability and safety. But to truly maximize that investment, it all comes down to one critical task: proper cleaning. Using the right techniques and, most importantly, a pH-neutral cleaner, is absolutely essential. This isn't just about appearance; it’s about protecting the material, preventing costly premature wear, and maintaining its crucial slip-resistance to ensure a safe environment.
Why Your Rubber Floor Cleaning Method Matters

Choosing how you clean your rubber flooring is a strategic decision that directly impacts the floor's lifespan, its safety features, and your long-term maintenance budget. Reaching for a generic, harsh cleaner or an abrasive tool can strip the protective finish, degrade the rubber, and reduce its natural grip. In a short time, your safety asset can become a significant liability.
Real-World Example: Consider a community fitness centre that invested in premium rubber flooring for its weightlifting area. The cleaning crew, assuming all hard floors were the same, used their standard acidic cleaner meant for tile. Within a year, the rubber surface became hard, brittle, and lost its signature "give." The direct benefits of shock absorption and user comfort were lost, leading to complaints and premature cracking. This costly damage could have been completely avoided by implementing a simple, actionable plan: daily sweeping and mopping with a dedicated pH-neutral cleaner.
Preserving Safety and Durability: The Core Benefits
A proper cleaning regimen is designed to protect the floor's integrity. The primary benefit is preserving the qualities you chose rubber flooring for in the first place:
- Slip Resistance: This is non-negotiable in places like hospital corridors, commercial kitchens, and gyms where spills are inevitable. The wrong cleaning products can leave a slick residue, turning a safe surface into a hazard. Benefit: Reduced risk of slip-and-fall accidents and associated liabilities.
- Shock Absorption: Essential for comfort and joint protection in gyms, workshops, and play areas. Harsh chemicals can harden the material, eliminating its crucial cushioning properties. Benefit: Enhanced user comfort and safety, which is especially important for employee well-being and productivity.
- Durability: Rubber is tough, but solvents and oil-based cleaners will actively break down the material over time, causing it to fail much sooner than it should. Benefit: Maximized lifespan of your flooring investment, avoiding expensive replacement costs.
Actionable Takeaway: The goal of cleaning rubber flooring isn't just to remove dirt. It's to do so without compromising the material's core properties. A gentle, consistent approach ensures your floor performs as intended for years, saving you money and keeping users safe.
The demand for these durable surfaces is growing. The global rubber flooring market is valued at around $1.1 billion and continues to expand, driven by its use in commercial, healthcare, and educational settings where safety is the top priority. This growth highlights how critical it is to have cleaning solutions tailored to rubber's unique needs.
This is especially true in schools, where high foot traffic and constant spills are daily occurrences. An effective cleaning strategy is key to maintaining a safe and hygienic environment for students. You can learn more about the advantages of using rubber flooring for classrooms in our detailed guide.
Assembling Your Rubber Floor Cleaning Toolkit
Before you begin cleaning, you must assemble the right tools. A well-thought-out toolkit is the difference between a quick, effective clean and accidentally causing irreversible damage to your flooring. You need specific tools for daily maintenance and others for periodic deep cleaning.
For daily tasks, simple and gentle tools are best. A soft-bristle broom is perfect for sweeping up loose dirt without scratching the surface. A vacuum with a hard floor attachment is also effective. For mopping, a microfiber mop is essential. Microfiber is superior because it requires far less water and cleaning solution, which is key to preventing moisture from seeping into the seams of your floor and causing damage.
As you can see, dealing with an oily residue from machinery requires a different approach than simply sweeping up dust. This is precisely why having the right cleaner in your arsenal is non-negotiable.
Choosing the Right Cleaning Solution
The single most important item in your toolkit is the cleaning solution itself. Using the wrong chemical is the fastest way to ruin a rubber floor.
You must use a pH-neutral cleaner. This is a strict rule. Anything acidic (like vinegar) or highly alkaline (like bleach or ammonia) will chemically degrade the rubber. It will become brittle, lose its color, and its vital slip resistance will be compromised.
Critical Insight: Solvents, oil-based soaps (like Pine-Sol or Murphy's Oil Soap), and other harsh detergents actively break down the polymers in your rubber flooring. This damage is irreversible and will almost certainly void your manufacturer's warranty, leading to significant financial loss.
Real-World Example: A busy warehouse installed anti-fatigue rubber runners in its packing stations. To tackle grease spots, the manager used a common industrial degreaser without checking its pH level. The degreaser stripped the finish and made the rubber tacky, causing dirt to stick to it and making it impossible to clean properly. The benefit of an easily maintained, clean-looking floor was lost.
Choosing Your Rubber Floor Cleaner
Should you use a professional-grade commercial cleaner or a DIY solution? The best choice depends on your specific needs, budget, and the type of soil you're dealing with. A high-traffic commercial gym has very different cleaning demands than a home playroom.
Here’s a practical breakdown to help you decide:
| Feature | Commercial pH-Neutral Cleaner | DIY Solution (e.g., Water + Mild Soap) |
|---|---|---|
| Effectiveness | High; expertly formulated to tackle stubborn grime and oils. | Good for light, daily dirt and cleaning up fresh spills. |
| Safety | Guaranteed to be safe for rubber when used as directed. | Safe, but you must use the right kind of mild, non-oil soap. |
| Cost | Higher initial cost per bottle. | Extremely low cost, using household items. |
| Best For | Deep cleaning, high-traffic areas, and commercial gyms. | Daily maintenance, low-traffic areas, homes, and daycares. |
Actionable Strategy: For most businesses, a hybrid approach is best. Use a cost-effective DIY solution for daily light cleaning, but keep a trusted commercial pH-neutral cleaner on hand for monthly or quarterly deep cleans. This gives you the best of both worlds: economical daily upkeep and the heavy-duty power needed to keep your floors in top condition.
The Daily Routine for Flawless Rubber Floors
When it comes to maintaining rubber flooring, consistency is everything. A simple, daily cleaning routine is not a time-consuming chore; it's a preventative measure that stops everyday dirt from becoming a major problem. This protects your investment and keeps your space looking professional and safe.
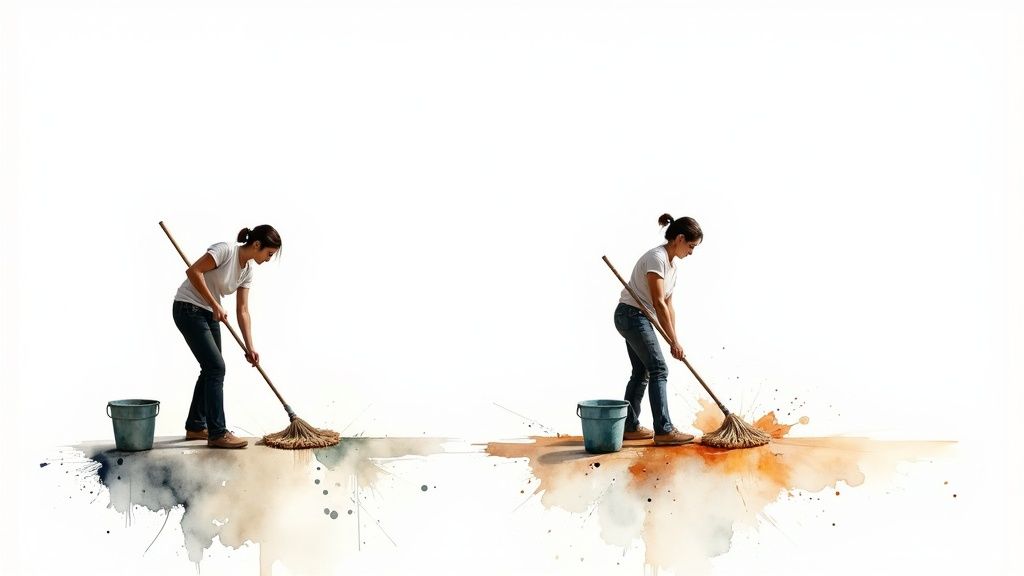
Your first action should always be removing dry debris. Use a soft-bristle broom or a vacuum cleaner with a hard floor setting (ensure the beater bar is off) to collect all loose dust, grit, and dirt. Skipping this step means you will grind abrasive particles into the floor when you mop, creating micro-scratches that dull the finish over time.
Once the loose debris is gone, you can damp mop. Here's the golden rule of cleaning rubber flooring: never flood the floor with water. Excess water is your enemy. It can seep into seams, get under the flooring, and damage the subfloor or weaken the adhesive.
The Right Way to Mop: A Step-by-Step Guide
For your daily clean, your go-to kit is a microfiber mop and a bucket of lukewarm water mixed with a small amount of pH-neutral cleaner.
- Wring It Out: Your mop head should be damp, not sopping wet. If you can squeeze a stream of water from it, it's too wet. Benefit: This prevents water damage to seams and the subfloor.
- Mop in Sections: Work in one manageable area at a time. Let it air dry completely before moving to the next section. Benefit: This ensures an even clean without leaving puddles or streaks.
- Keep Your Water Clean: The moment your bucket water looks murky, it's time for a fresh batch. Cleaning with dirty water only spreads grime around. Benefit: This guarantees you are actually removing dirt, not just redistributing it.
Real-World Example: The facilities manager for a busy corporate office implemented a simple end-of-day routine for the entryway. A five-minute sweep to remove tracked-in dirt, followed by a quick damp mop of the main walkway. This small daily effort drastically reduced grime buildup and prevented salt stains in winter. The direct benefit was a consistently sharp-looking entrance without the cost of a major daily cleaning crew.
It's More Than Just About Looks
This daily discipline protects the floor's core functions. In areas where people stand all day, a well-maintained floor continues to provide vital support. For a deeper dive into this, check out our guide on the many anti-fatigue mat benefits.
A clean rubber surface offers better shock absorption and comfort, directly improving employee well-being and productivity. By regularly removing abrasive grit, you dramatically extend your floor's life, saving a fortune in future replacement costs.
How to Deep Clean Rubber Flooring: Restoring and Rejuvenating
When daily cleaning isn't enough to combat heavy foot traffic, grime, and scuff marks, it's time for a deep clean. This is a restorative process that pulls out embedded dirt, rejuvenating your rubber flooring and keeping it safe and professional for years to come.
Whether you use professional machinery or manual methods, the strategy is the same: use the right tools, the right cleaner, and the right technique for maximum benefit.
For Large Spaces: The Auto Scrubber Method
For a massive area—like a school gymnasium, a hospital corridor, or a large retail floor—an auto scrubber is your most efficient tool. These machines provide a consistent, deep clean that is nearly impossible to achieve by hand. However, you must use the correct settings to avoid damaging your floor.
Here is your action plan for using an auto scrubber:
- Step 1: Use a Non-Abrasive Pad. This is non-negotiable. Always use a soft, non-abrasive pad or brush (red or white pads are generally safe for rubber). Avoid aggressive pads (like black or brown ones) which can strip the finish and tear the rubber.
- Step 2: Use a pH-Neutral Cleaner. Fill the machine’s tank with a quality, pH-neutral cleaner formulated for rubber. Never use solvents or aggressive degreasers.
- Step 3: Set to Low and Slow. Operate the machine on a low-speed, low-pressure setting. High speed creates friction and heat, which can cause permanent damage to rubber flooring.
Real-World Example: An Industrial Workshop Turnaround
An industrial workshop's rubber flooring was caked in grease, oil, and metal shavings, making it a slip hazard. Daily mopping was ineffective. By using an auto scrubber on its lowest speed with a soft nylon brush and a specialized (but still pH-neutral) degreaser, the transformation was incredible. The machine's powerful vacuum lifted the grimy slurry, revealing a clean, non-slip surface. The direct benefit was a drastic improvement in workshop safety and a reduction in cleaning labor costs.
For Smaller Areas: The Manual Deep Clean
No auto scrubber? No problem. You can still achieve fantastic results with the right manual tools. This approach is perfect for smaller commercial spaces or when heavy machinery is not available.
First, gather your kit: a deck brush with soft or medium bristles, two buckets, your pH-neutral cleaner, and a wet-dry vacuum.
Your Step-by-Step Manual Deep Cleaning Process:
- Work in Sections: Tackle small, manageable areas, about 10x10 feet at a time.
- Apply Solution: Mix your cleaning solution with warm water in one bucket and apply it to the section. Let it sit for 5-10 minutes to penetrate the grime.
- Scrub: Use the deck brush to scrub the area. The bristles will agitate and lift the embedded dirt that a mop misses.
- Remove Slurry: Immediately use the wet-dry vac to suck up all the dirty water. This is the most crucial step. If you let the grimy water dry, the dirt will resettle into the rubber's pores.
- Rinse: Lightly mop the area with clean water from your second bucket to remove any cleaning residue, then let the floor air dry.
This hands-on method, while more labor-intensive, is incredibly effective. For more general advice, check out our guide on effective floor mat cleaning.
The move towards efficient cleaning is a global trend. The market for floor cleaning equipment has grown to around $12.86 billion, showing that businesses are investing in better ways to maintain large spaces. You can see more on the growth of floor cleaning machinery on Grand View Research.
Dealing with Scuffs, Spills, and Stains
No matter how tough your rubber flooring is, scuffs and spills will happen. The good news is that these blemishes don't have to be permanent. With a swift, targeted approach, you can handle most spots without resorting to harsh chemicals that could damage your floor.
The golden rule is to address spills immediately. The longer a substance sits, the deeper it can penetrate the rubber's pores, turning a simple cleanup into a major restoration. Acting fast is your most effective strategy.
How to Handle Everyday Scuffs and Marks
Dark scuff marks from shoes are the most common issue on rubber floors, especially in gyms or busy hallways. Luckily, they are often the easiest problem to fix.
Actionable Tip: Your best first tool is a clean tennis ball. The felt has just enough gentle abrasion to lift shoe sole residue from the floor's surface. Simply rub the scuff firmly with the tennis ball until it disappears.
If that doesn't work, your next step is a melamine foam eraser (like a Magic Eraser). Dampen it slightly with water and gently rub the mark. Its fine abrasive texture lifts the scuff without scratching the flooring.
Real-World Example: Keeping a School Gym Game-Ready
A high school gym is covered in black streaks after basketball practice. Instead of running a large cleaning machine daily, the maintenance crew uses an ingenious, low-cost tool: tennis balls attached to the ends of broom handles. They can quickly "erase" scuffs in minutes. The benefit is a court that stays looking sharp for the next class or a big game with minimal effort and cost.
How to Tackle Tougher Spills and Stains
For more serious spills like grease, ink, or sugary drinks, you need a targeted approach.
- Grease and Oil: First, blot up the spill with a clean, dry cloth (don't wipe, as it will spread the stain). Then, apply a small amount of pH-neutral degreaser or your rubber floor cleaner to a microfiber cloth and work the stain from the outside in to prevent it from spreading.
- Ink or Food Dyes: For stubborn stains, use a cleaner specifically formulated for rubber. Apply it to a cloth and gently dab the stain. Resist the urge to scrub, which can force the pigment deeper into the floor.
- Chewing Gum: Never try to scrape off soft gum. First, harden it by placing an ice cube in a plastic bag and holding it on the gum until it's brittle. Once frozen, you can gently chip it off with a plastic scraper.
Of course, the best way to handle stains is prevention. Well-placed commercial walk-off mats will catch the vast majority of dirt and moisture at the door, dramatically reducing the cleaning you have to do inside.
Your Top Questions About Rubber Floor Care, Answered
Even with a solid plan, questions arise when caring for rubber flooring. Here are clear, actionable answers to the most common concerns, helping you protect your investment.
Can I Use a Steam Cleaner on My Rubber Flooring?
The short answer is an emphatic no. Never use a steam cleaner on any type of rubber flooring.
The intense, direct heat from a steam cleaner causes the rubber to expand, which can destroy the adhesive bond holding it to the subfloor. This can lead to bubbling, lifted seams, or warped tiles, creating a significant trip hazard and requiring costly repairs.
A Cautionary Tale: A new boutique spin studio used a commercial steam cleaner for a "deep, sanitizing clean" on their premium rubber flooring. Within weeks, the tile edges began to curl. This created an unprofessional look and a dangerous environment, resulting in a costly and disruptive repair job. The benefit of a quick "sanitizing" clean was completely negated by the long-term damage. Always stick to cold or lukewarm water and a pH-neutral cleaner.
How Often Should I Deep Clean a Commercial Rubber Floor?
The frequency of deep cleaning depends entirely on foot traffic. There's no single magic number, but here is a practical guide:
- High-Traffic Zones (e.g., gym main floor, retail entryway): These areas see constant use. A monthly or quarterly deep clean with an auto scrubber or deck brush is necessary to prevent grime from becoming embedded.
- Lower-Traffic Areas (e.g., office breakroom, yoga studio): These spaces can go longer between deep cleans. Every 6 to 12 months is typically sufficient.
Actionable Tip: Let the floor tell you when it needs attention. If daily mopping no longer leaves the floor looking clean and the surface appears dull, it's time for a deep clean.
What’s the Best Way to Protect Rubber Flooring From Damage?
Prevention is always more cost-effective than a cure. Protecting your rubber flooring is an ongoing strategy.
- Use Entrance Mats: Place high-quality walk-off mats at all entrances. This is your non-negotiable first line of defense to scrape dirt and trap moisture.
- Use Furniture Pads: Place protective, non-staining pads under the legs of heavy equipment or furniture to distribute weight and prevent permanent indentations.
- Clean Spills Immediately: Make it a rule to clean up spills the moment they happen. The faster you act, the less chance a substance has to set and cause a permanent stain.
Are There Eco-Friendly Options for Cleaning Rubber Floors?
Absolutely! Adopting an eco-friendly cleaning rubber flooring routine is both effective and easy. Many manufacturers now offer biodegradable, plant-based, pH-neutral cleaners specifically designed for rubber. They perform exceptionally well and are safe for your floor, your staff, and the environment.
For a simple and effective DIY solution, mix a gallon of water with a few drops of biodegradable, non-oil-based dish soap. When paired with a microfiber mop—which requires significantly less water and cleaning solution—you have a powerful, eco-conscious cleaning system.
At Mats4U, we know that the right matting is your first line of defense in keeping any floor pristine. Explore our extensive collection of high-quality entrance mats, anti-fatigue flooring, and custom logo mats designed to protect your investment and enhance your space. Visit us at https://www.mats4u.com to find the perfect solution for your facility.


